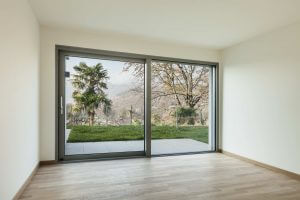
There are several benefits of replacing a uPVC door. However, to ensure a stress-free and successful installation of the new uPVC door, you have to consider several factors.
This step-by-step guide outlines key considerations and covers expert installation tips that will help you get a flawless finish. So, dive in and discover the secrets to a seamless uPVC door replacement.
The Homeowner’s Guide to Easy uPVC Door Replacement
Gather Your Tools
Gathering the required equipment is the first step in the uPVC door replace process. Having the right tools will save you time and facilitate smooth replacement.
So, before starting the installation, gather the following essential tools:
- Screwdrivers
- Hinges
- Pliers
- Wrenches
- Measuring tape
- Square
- Pry bar
- Clamps and wedges
- Silicone sealants
- Caulk gun
- Weather strips
- Safety gear, including glasses and gloves
- Door removal tool
- Hinge removal tool
Measure the Opening
To ensure a stress-free uPVC door replacement process, it is important that you precisely measure the dimensions of the door opening, record the measurements and verify that they match the new uPVC door specification.
To measure the opening accurately, use a measuring tape or a calliper and account for obstructions, such as hinges and handles present on the door.
Clear the Surrounding Areas
A clear workspace ensures efficient measurement and replacement. Thus, before removing the old door, you must remove nearby furniture and fixtures or decorations (if any).
This step will help prevent damage to surrounding areas and reduce the risk of injury.
Remove the Old Door
- Removing the Hardware: Remove hinges, handles and locking mechanisms of the door using a screwdriver. Set the hardware aside in a container for reuse or disposal.
- Loosening the Screws: Locate the screws, usually found along the top and sides, that secure the door frame. Carefully loosen them by turning them counterclockwise. Once loosened, remove the screws to detach the frame from the wall.
- Prying the Frame: With screws removed, insert a pry bar between the door frame and wall and pry the frame away from the wall.
Begin at one corner by applying controlled pressure and carefully navigate around the other side of the frame.
- Removing the Door: Lift the door and frame out of the door opening. Be mindful of the door’s size and weight, and consider hiring someone to help ensure the safe removal of the door.
- Clean the Opening: Once the door is removed from its place, inspect the door opening thoroughly and clean any dirt or debris using an appropriate tool.
Install the New uPVC Door
With the old door removed successfully, you can proceed with the installation of the new uPVC door by following the below-written instructions:
Install New Frame
- Verify that the new frame is level and plumb using a spirit level.
- Mark the new frame’s screw locations on the wall and drill pilot holes.
- Place and tighten the screws to secure the new frame to the opening.
- Apply sealant at the joints of the wall and frame.
Install New uPVC Door
- Lift the door and align it with the door frame.
- Position the door into the frame.
- Check the door alignment and ensure a proper fit.
- Adjust the alignment if needed.
- Attach hinges to the frame and door and secure them with screws.
- Install other hardware, such as handles, locking systems, etc.
- Test door operation by opening and closing it multiple times.
- Seal the door with high-quality sealants and weatherstripping materials.
Post-Installation Care
For optimal performance, regularly clean the uPVC door, lubricate the moving parts of the door and check for any potential gaps or cracks in the seals.
Conclusion
Replacing a worn-out or outdated uPVC door can enhance your home’s energy efficiency, security and visual appeal, provided that it is removed and installed properly.
By following the steps given above, you can complete the uPVC door replace process with confidence and enjoy the rewards of a well-installed new uPVC door.
However, if you are short on time or do not have the expertise for DIY replacement, trust the professionals of AIS Glasxperts for swift and reliable uPVC door installation.
Consider replacing your uPVC door with AIS Glasxperts and enjoy end-to-end expertise, customised solutions, flawless installation and after-sales support.
Visit AIS Glasxperts and explore our premium uPVC doors collection now!
.jpg)
.png)
.png)
.jpg)

.png)